Pick and Place 文件指南 — SMT 用 Centroid 文件
SMT 厂家需要的文件
每块 SMT 装配的 PCB 都需要 pick-and-place(PnP)文件,配合 Gerber 与 BOM 提交。没有它,装配机就没法知道每个元件该放哪里。但 PnP 文件生成是可装配性设计工作流里最容易出错的一步 — 旋转约定不对、未过滤直插件、原点偏移失误,是首单装配失败的主要原因。本指南覆盖 KiCad、Altium、Eagle、EasyEDA 的 PnP 导出与提交前的验证流程。
Pick and Place 文件里有什么
pick-and-place 文件(也叫 centroid 文件、.pos、.cpl 或 .csv)是列出每个 SMT 元件的 CSV:参考标号(R1、U2)、元件中心 X 坐标、Y 坐标、旋转角(0/90/180/270)、所在层(顶/底)、可选的封装名。SMT 机相对面板基准点读取坐标,所以坐标系定义和值本身一样重要。标准列序按工具不同:KiCad 默认与 Altium 默认与 JLCPCB 期望格式都不同。
本指南覆盖
- KiCad .pos 导出 — 辅助轴原点、上下文件分割、JLCPCB 重命名约定。
- Altium CPL — 符合 IPC-7351 的旋转、文件命名、JLCPCB 兼容性。
- Eagle .mnt — mountsmd.ulp 脚本、ASCII 转 CSV、层分离。
- EasyEDA centroid — JLC 兼容导出、直接提交工作流。
- 旋转修正 — JLC 按封装的偏移表、常见 SOT-23/QFN 修复。
- 直插件过滤 — 把 SMT 与直插件分开、手动放置工作流。
如何验证 Pick and Place
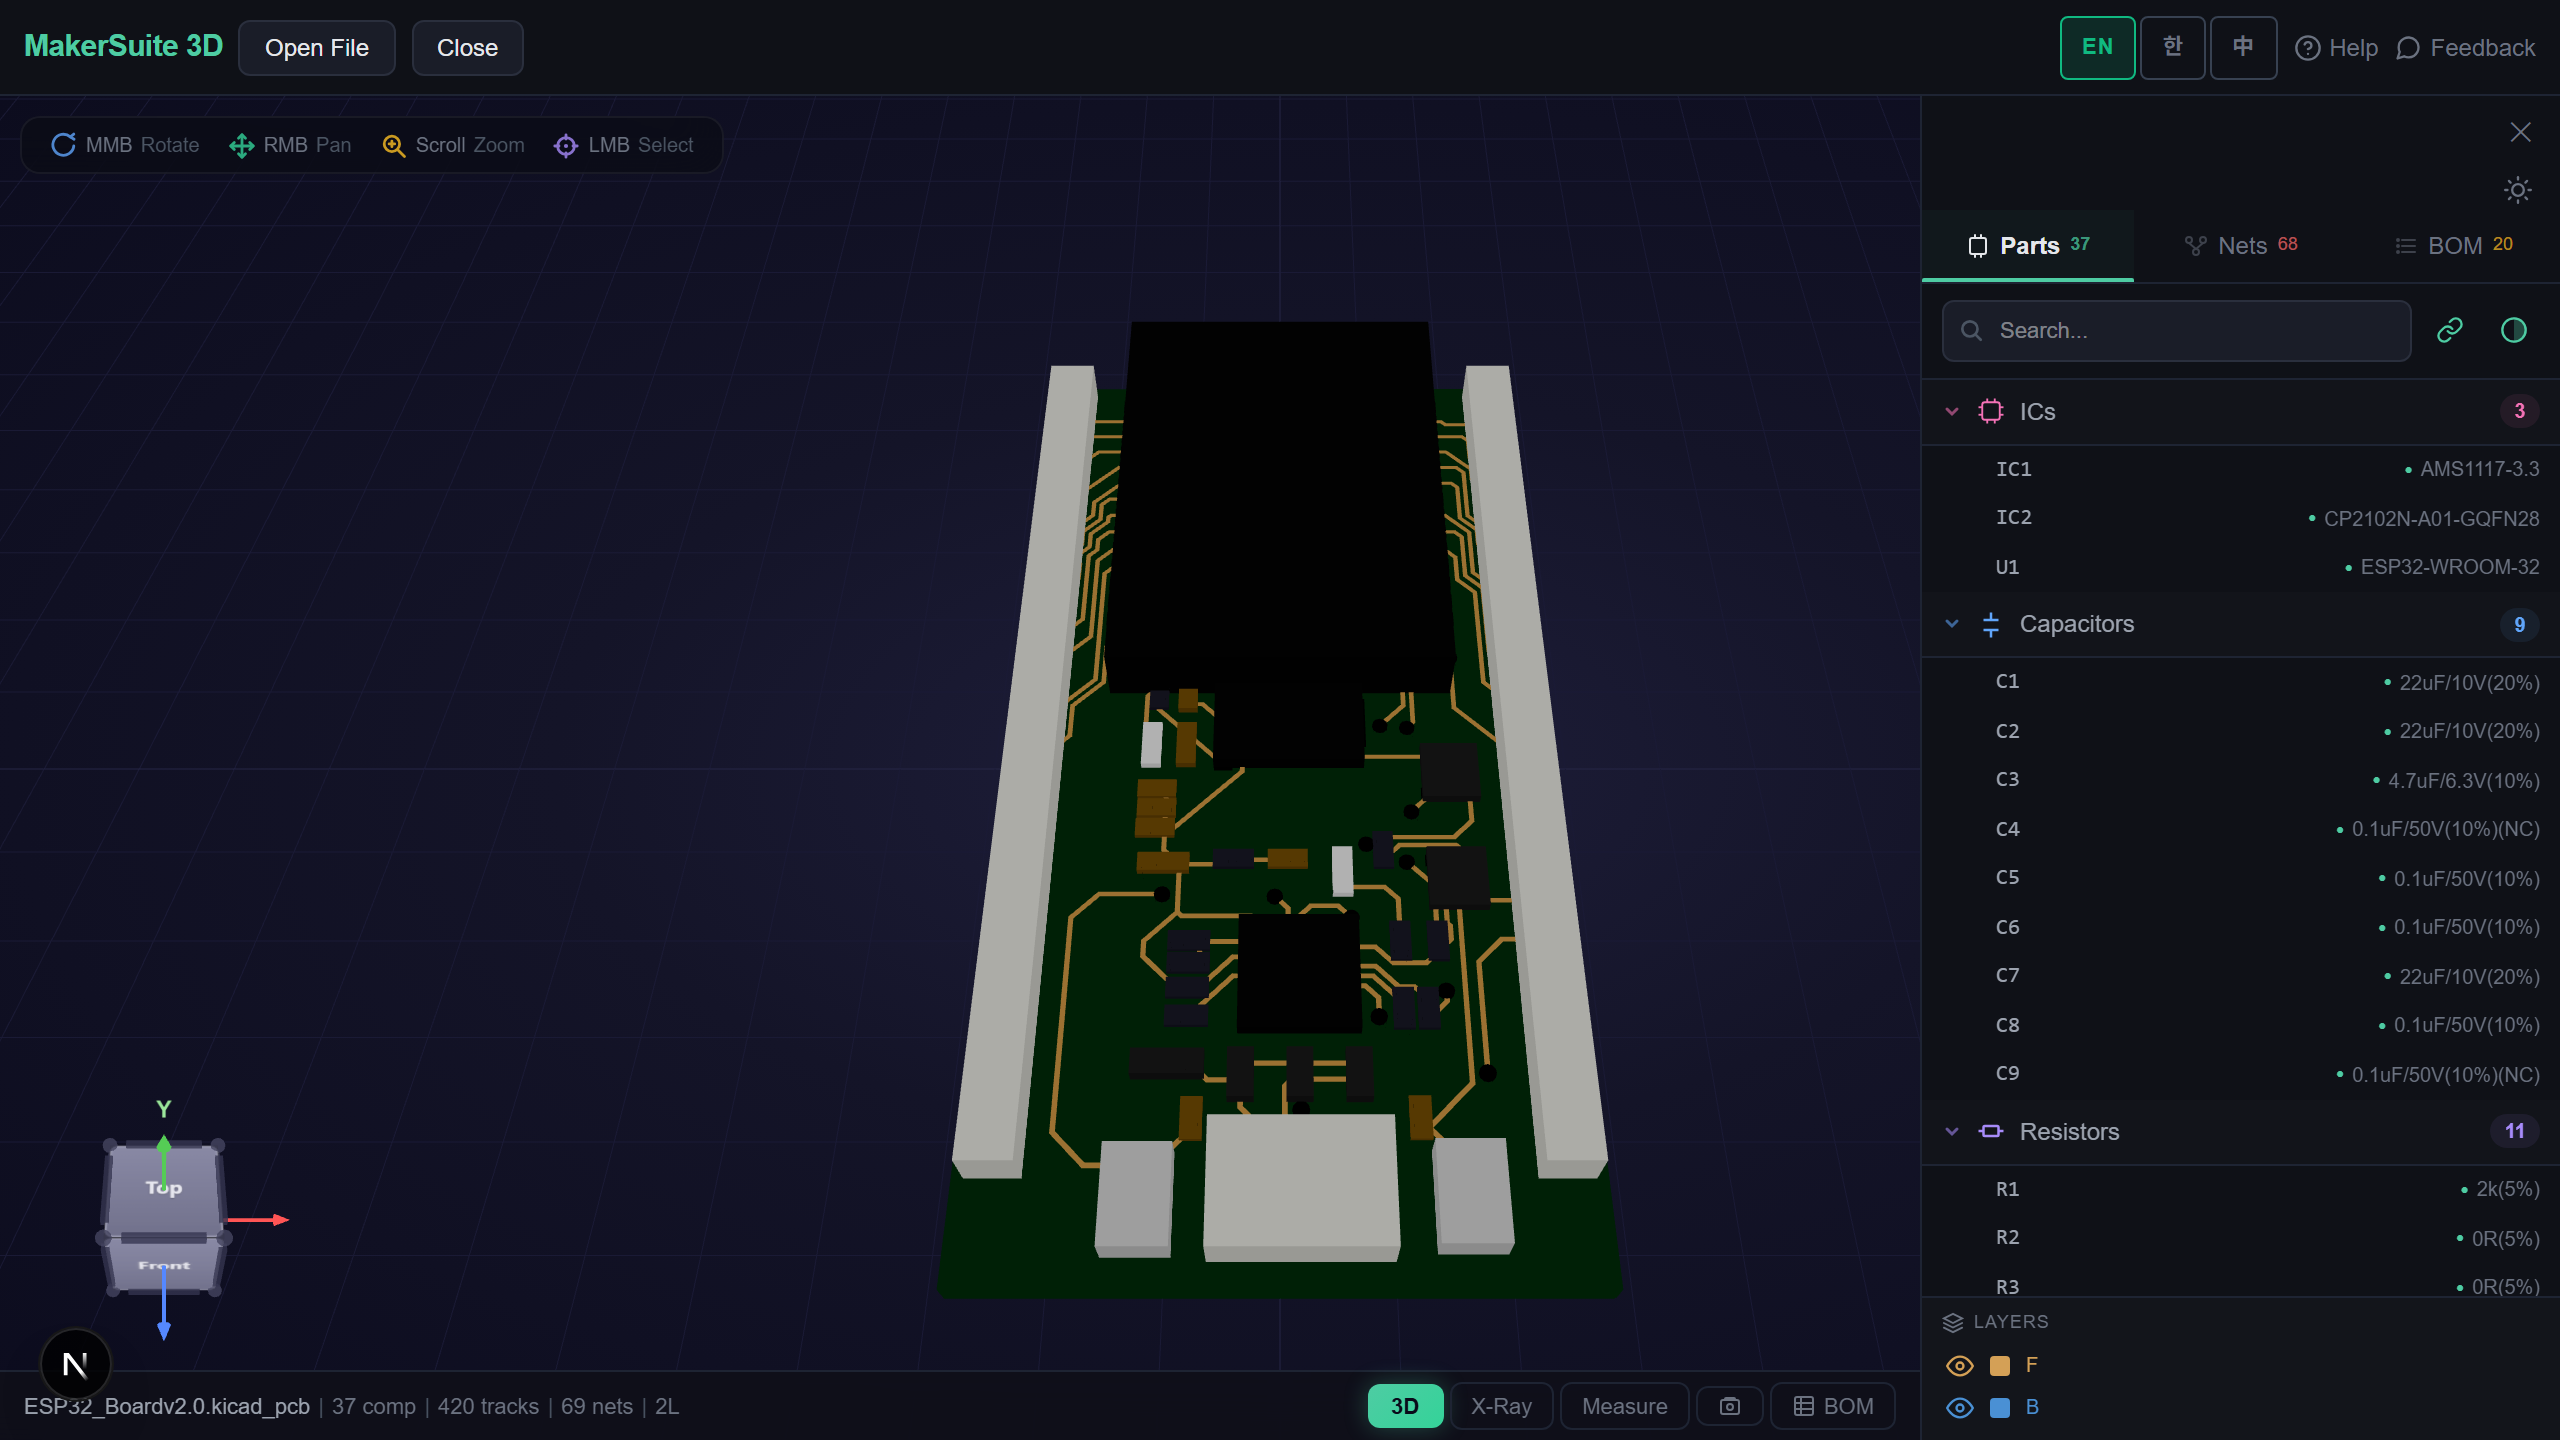
- Open pcbviewer.app 并拖入 PCB 文件。元件以可见朝向 3D 渲染。
- 打开 BOM 面板。Designator + Footprint 列帮你在 SMT 提交前发现旋转错误。
- 对每个元件,验证 3D 朝向匹配厂家规格书的引脚 1 标记。
- 对照 JLC 库封装预览(jlcpcb.com/parts/<LCSC code>)做旋转偏移交叉核对。
- 首次 SMT 订单,制造前请装配厂提供 placement 预览。
在 3D 验证 pick-and-place 朝向 — 拖入 PCB 在 SMT 提交前检查每个元件的旋转。
免费试用 MakerSuite 3D为什么 PnP 错误代价高
CPL 文件里的旋转错误会让 SMT 机以错误角度放置元件。直到目检或首次上电才发现,那时整个面板已经废了。JLCPCB 每板型 SMT 起始费 $8 — 5 块原型重复,一个坏的 CPL 文件就是 $40 加一周交期。提交前在 3D 查看器验证朝向能以零额外成本预防最常见的装配失败。
PnP 文件何时出现
- JLCPCB SMT — 每个装配订单必需输入,由其 BOM 工具校验
- PCBWay 装配 — 同样角色,列序约定略有不同
- 自厂 SMT — 自家工厂的机器在量产时读 PnP
- 代工厂报价 — 装配厂用 PnP 估算贴装时间报价
- 手动装配 — 制造商用 PnP 打印手放原型板的返修指引
浏览器端解析,零上传
PCB 文件含专有产品设计。MakerSuite 3D 在你的浏览器里完整解析文件;零服务器上传,零缓存。元件位置、旋转、参考标号留在你的机器上。NDA 评审与未发布产品工作流(装配过程会披露敏感工程选择)安全。
常见问题
What's a pick-and-place file?
A pick-and-place (PnP) file — also called centroid file, position file, or .pos/.cpl/.csv depending on the tool — lists every SMT component's reference designator, X/Y center coordinate, rotation angle, and which side of the board it sits on (top or bottom). The SMT assembly machine reads this file to know where to place each part. Format is plain CSV or whitespace-delimited text. Standard columns: Designator, Footprint, Mid X, Mid Y, Rotation, Layer (or Side). Without it, the assembly house has to manually digitize component positions from the Gerber, which costs $50-200 in setup fees and adds a day to lead time.
How do I export pick-and-place from KiCad?
File > Fabrication Outputs > Component Placement (.pos). Select 'Use auxiliary axis as origin' if you defined one (recommended — sets a known reference point that fab can use for board fixturing). Choose CSV format; ASCII is for legacy machines only. Top and bottom layers export as separate files (project_name-top.pos, project_name-bottom.pos). For JLCPCB SMT, rename to project_name_cpl_top.csv to match their convention. Verify rotations using the 3D viewer before submitting — KiCad rotation conventions differ from many commercial CAD tools.
How do I export from Altium and Eagle?
Altium: File > Assembly Outputs > Generate Pick and Place Files. Choose CSV. Altium's default rotation matches the IPC-7351 convention. Eagle: Run the mountsmd.ulp script (Edit > Run > mountsmd.ulp) — this generates separate top.mnt and bottom.mnt files. Eagle uses ASCII format by default; convert to CSV via spreadsheet for JLCPCB submission. EasyEDA: File > Export > Pick and Place. EasyEDA exports JLCPCB-compatible format directly because it's the same parent company. For all tools, verify rotation conventions before first SMT order.
Why are rotations always wrong on first order?
Two reasons. First, EDA tools and component manufacturers disagree on the 'natural' rotation of each part — KiCad places SOIC-8 with pin 1 top-left, but the JLC library may have it pin 1 top-right. Second, JLCPCB and PCBWay rotate parts in their library at different angles than your EDA tool. The fix: download the part library's footprint preview from JLC's part page, compare to your KiCad/Altium footprint orientation, and add the offset to your CPL file before submitting. JLCPCB's rotation FAQ has a per-package offset table (typical: SOT-23 needs 180°, QFN sometimes 90°).
What if I'm using through-hole only?
You don't need a pick-and-place file. Through-hole assembly uses different equipment (wave solder or selective solder) that doesn't read a centroid file. The board outline, drill file, and silkscreen are sufficient for through-hole assembly. If your board mixes SMT (most parts) with a few through-hole parts (connectors, big electrolytics), generate the PnP for SMT only — the assembly house manually places the through-hole parts in a second operation. Mark through-hole parts as 'do not place' in your CPL or simply omit them from the file.
相关文章
验证 pick-and-place 朝向 — 在 SMT 提交前拖入 PCB 文件
打开 MakerSuite 3D