JLCPCB 파일 체크리스트 — 무엇을 제출하고 어떻게 검증하나
첫 주문 핑퐁 회피
첫 JLCPCB 고객은 첫 보드 출하 전 파일 이슈로 1~2일 핑퐁. 누락 레이어·잘못된 드릴 포맷·JLC 라이브러리 없는 BOM 부품·잘못된 컬럼 순서 CPL — 모두 제출 전 체크리스트로 방지 가능. 이 가이드는 JLCPCB가 베어 PCB·SMT 어셈블리·3D 프린팅·스텐실 서비스에 필요한 정확한 파일과 제출 전 이슈 잡는 검증 워크플로우 안내.
JLCPCB의 파일 기대
JLCPCB가 Gerber RS-274X(선호)·Gerber X2(수용)·KiCad .kicad_pcb 파일(자동 변환)·주의사항 있는 Altium .PcbDoc 수용. Gerber zip은 레이어당 한 파일(상단 구리·하단 구리·상단 마스크·하단 마스크·상단 실크·하단 실크·페이스트 레이어·아웃라인) 포함 + Excellon 드릴 파일 하나. JLC gerber 뷰어 jlcpcb.com/quote가 모든 것 사전 검증 — 여기서 플래그된 이슈가 패브리케이션 막음, 체크아웃 전 항상 실행. 전체 디자인 룰 스펙은 jlcpcb.com/capabilities.
이 체크리스트 다루는 것
- 베어 PCB 파일 — Gerber zip·Excellon 드릴·아웃라인 레이어·솔더마스크 컬러 옵션.
- SMT 어셈블리 추가 — BOM CSV 포맷·CPL/centroid CSV·JLC 부품 라이브러리 검증.
- 3D 프린팅 파일 — STL·STEP·언제 어느 쪽.
- 스텐실 주문 — 페이스트 레이어 Gerber·스텐실 두께 선택.
- 디자인 룰 — 5/5 mil 2 레이어·4/4 mil 4 레이어·드릴 최소·보드 크기 한계.
- 제출 전 검증 — MakerSuite 3D·JLC 뷰어·BOM 도구 3 단계 워크플로우.
JLCPCB 제출 전 검증 방법
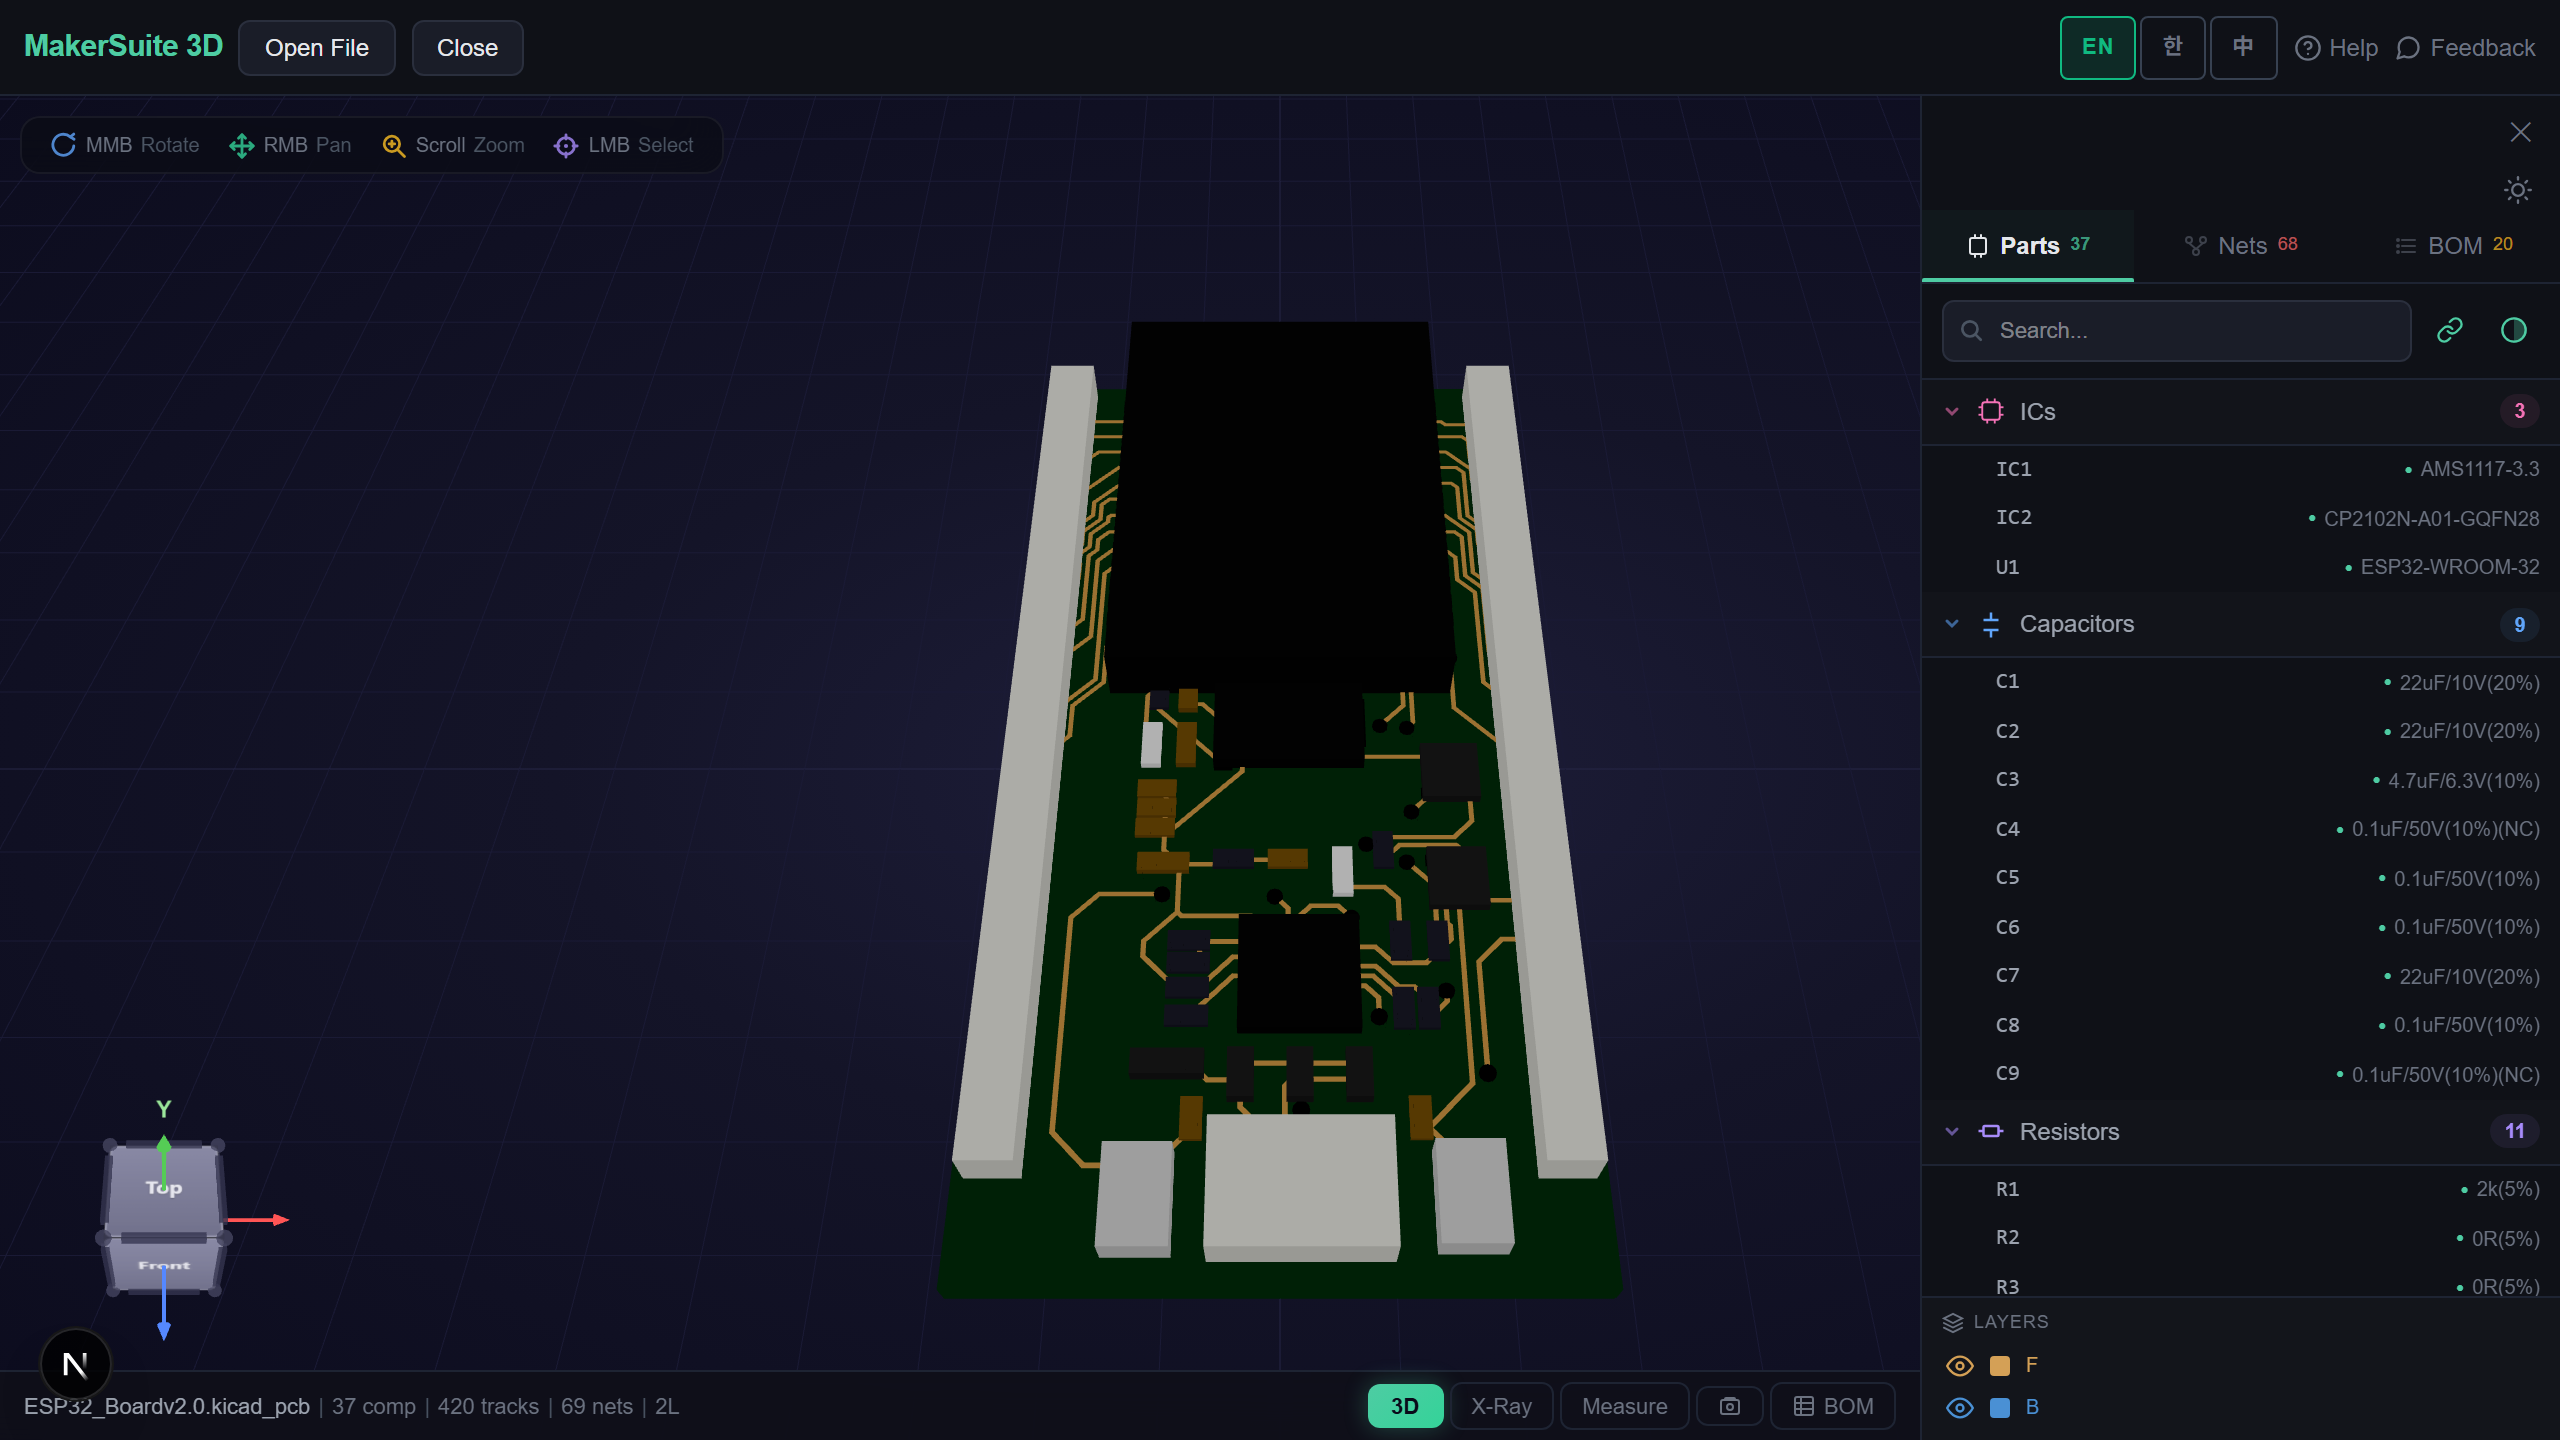
- Open pcbviewer.app 하고 Gerber zip 드롭. 3D 렌더링이 누락 레이어 즉시 표시.
- 레이어 패널 체크 — 모든 기대 레이어(Cu·마스크·실크·페이스트·아웃라인) 존재·가시 확인.
- BOM 패널 열고 LCSC 검색 실행. 'pre-order' 마크 부품은 추가 비용·긴 리드타임 발생.
- 같은 zip을 JLCPCB gerber 뷰어(jlcpcb.com/quote)에 업로드해 디자인 룰 위반 플래깅.
- SMT는 JLC BOM 도구로 모든 부품 JLC 코드 있는지 검증. 코드 없는 부품은 'Pre-Order' 마크 또는 대체.
체크아웃 전 JLCPCB 제출 이슈 잡기 — zip 드롭하고 브라우저에서 모든 레이어 검증.
MakerSuite 3D 무료로 써보기왜 첫 주문 검증이 보상하나
JLCPCB 고객 지원이 양방향 24시간+ 응답 시간 비동기 이메일. 단일 누락 레이어가 턴어라운드에 24~48시간 추가. 문제 있는 제출 핑퐁마다 곱하면 5일 주문이 2주 사가가 됨. 체크아웃 전 MakerSuite 3D와 JLC 웹 뷰어에서 파일 사전 비행이 10분 비용·1~2일 이메일 핑퐁 절감. 마감일 중요한 프로토타입에 가장 높은 ROI 프로세스 개선.
체크리스트 시간 절감 시기
- 첫 JLCPCB 주문 — 모든 흔한 실수(드릴 누락·잘못된 아웃라인 레이어·BOM 부품) 사전 캐치
- 다른 팹에서 전환 — JLC가 PCBWay·OSH Park와 약간 다른 컨벤션
- 타이트 마감일 — 사전 비행이 리드타임 1~2일 잡아먹을 이슈 캐치
- SMT 첫 고객 — BOM 도구 검증이 주문 전 대체 필요 부품 찾음
- 반복 프로덕션 — 표준 릴리스 프로세스 일부 체크리스트가 엔지니어링 간과 캐치
브라우저 측 파싱, 업로드 없음
PCB 파일은 종종 트레이드 시크릿 제품 설계 포함. MakerSuite 3D는 파일을 브라우저에서 완전 파싱; 서버 업로드 없음, 캐시 사본 없음. 레이어 지오메트리·부품 위치·BOM 데이터 모두 머신에 남음. JLCPCB 제출은 표준 주문 워크플로우에 따라 그들 서비스에 업로드 — MakerSuite 3D 범위 외부.
자주 묻는 질문
What files does JLCPCB need for bare PCB?
For bare PCB only (no assembly): zip of Gerber RS-274X files (one per copper layer + soldermask + silkscreen + paste + outline) plus Excellon drill file. JLCPCB accepts both .gbr and .gtl/.gbl/.gts/.gbs/.gto/.gbo extensions. Outline must be on the GKO or Edge.Cuts layer as a closed polygon. Drill file should be a single Excellon file with both PTH and NPTH holes (or two separate files). Total file count is usually 9-12 files inside one zip. JLCPCB's gerber viewer at jlcpcb.com/quote will show errors before you commit to ordering.
What additional files for SMT assembly?
On top of bare PCB files: BOM (CSV with columns Designator, Comment/Value, Footprint, JLCPCB Part #) and CPL/centroid file (CSV with Designator, Mid X, Mid Y, Layer, Rotation). JLC's BOM Tool web page validates the BOM against their parts library before submission — every part needs an LCSC code (e.g. C14857) or it's marked 'pre-order'. Pre-order parts cost extra ($3 setup fee per pre-order part) and add 5-7 days lead time. Stick to JLC Basic/Extended parts for fastest turnaround.
What about 3D printing or stencil files?
For 3D printing service (resin/SLA at JLC3DP): STL or STEP file. STEP preferred for parametric sharing; STL for organic shapes. For stencil ordering (separate JLC service): the same paste layer Gerber from your PCB project — JLC reads it and cuts a steel or polyimide stencil at the requested thickness (default 0.12mm). For CNC machining (JLCCNC): STEP file plus a 2D drawing PDF. For sheet metal: DXF for the flat pattern and STEP for the bent reference.
What design rules does JLCPCB enforce?
Standard 2-layer: 5/5 mil minimum trace/space, 0.3mm minimum drill, 0.5mm minimum outer hole annular ring. 4-layer: 4/4 mil trace/space, same drill rules. Min board size: 5×5mm. Max board size: 400×500mm for standard turnaround. SMT assembly: parts must be from JLC's library, fine pitch supported down to 0.4mm BGA pitch. Soldermask color: green (free), red/blue/yellow/white/black (small surcharge). Surface finish: HASL (free) or ENIG (recommended for fine pitch, surcharge). All these are documented at jlcpcb.com/capabilities.
How do I verify before ordering?
Three-step verification. First, drop your zip into MakerSuite 3D's Gerber viewer to render the board in 3D. This catches missing layers, missing drill files, and outline errors that Gerber-only previews miss. Second, upload to JLCPCB's web preview (jlcpcb.com/quote) — their viewer flags design rule violations specific to their fab process. Third, for SMT, use JLC's BOM tool to validate every part has a JLCPCB code. Following these three steps on the first order saves days of back-and-forth that's typical of new JLCPCB customers.
관련 글
JLCPCB 제출 검증 — Gerber zip 드롭하고 모든 레이어 먼저 체크
MakerSuite 3D 열기