Pick and Place File Guide — Centroid Files for SMT
The File Your SMT House Needs
Every SMT-assembled PCB requires a pick-and-place (PnP) file alongside Gerber and BOM. Without it, the assembly machine has no way to know where each component goes. Yet PnP file generation is the most error-prone step in the design-for-assembly workflow — wrong rotation conventions, missing through-hole filters, and origin offset mistakes are responsible for most first-order assembly failures. This guide covers KiCad, Altium, Eagle, and EasyEDA PnP export plus how to verify before submission.
What's in a Pick and Place File
A pick-and-place file (also called centroid file, .pos, .cpl, or .csv) is a CSV listing every SMT component with: reference designator (R1, U2), X coordinate of component center, Y coordinate, rotation angle (0/90/180/270), layer (top or bottom), and optional footprint name. The SMT machine reads coordinates relative to the panel's fiducial origin, so coordinate-system definition matters as much as the values themselves. Standard column order varies by tool: KiCad's default differs from Altium's default differs from JLCPCB's expected format.
What This Guide Covers
- KiCad .pos export — Auxiliary Axis origin, top/bottom file split, JLCPCB rename convention.
- Altium CPL — IPC-7351 compliant rotation, file naming, JLCPCB compatibility.
- Eagle .mnt — mountsmd.ulp script, ASCII-to-CSV conversion, layer separation.
- EasyEDA centroid — JLC-compatible export, direct submission workflow.
- Rotation correction — JLC's per-package offset table, common SOT-23/QFN fixes.
- Through-hole filtering — separating SMT from through-hole, hand-place workflow.
How to Verify Pick and Place
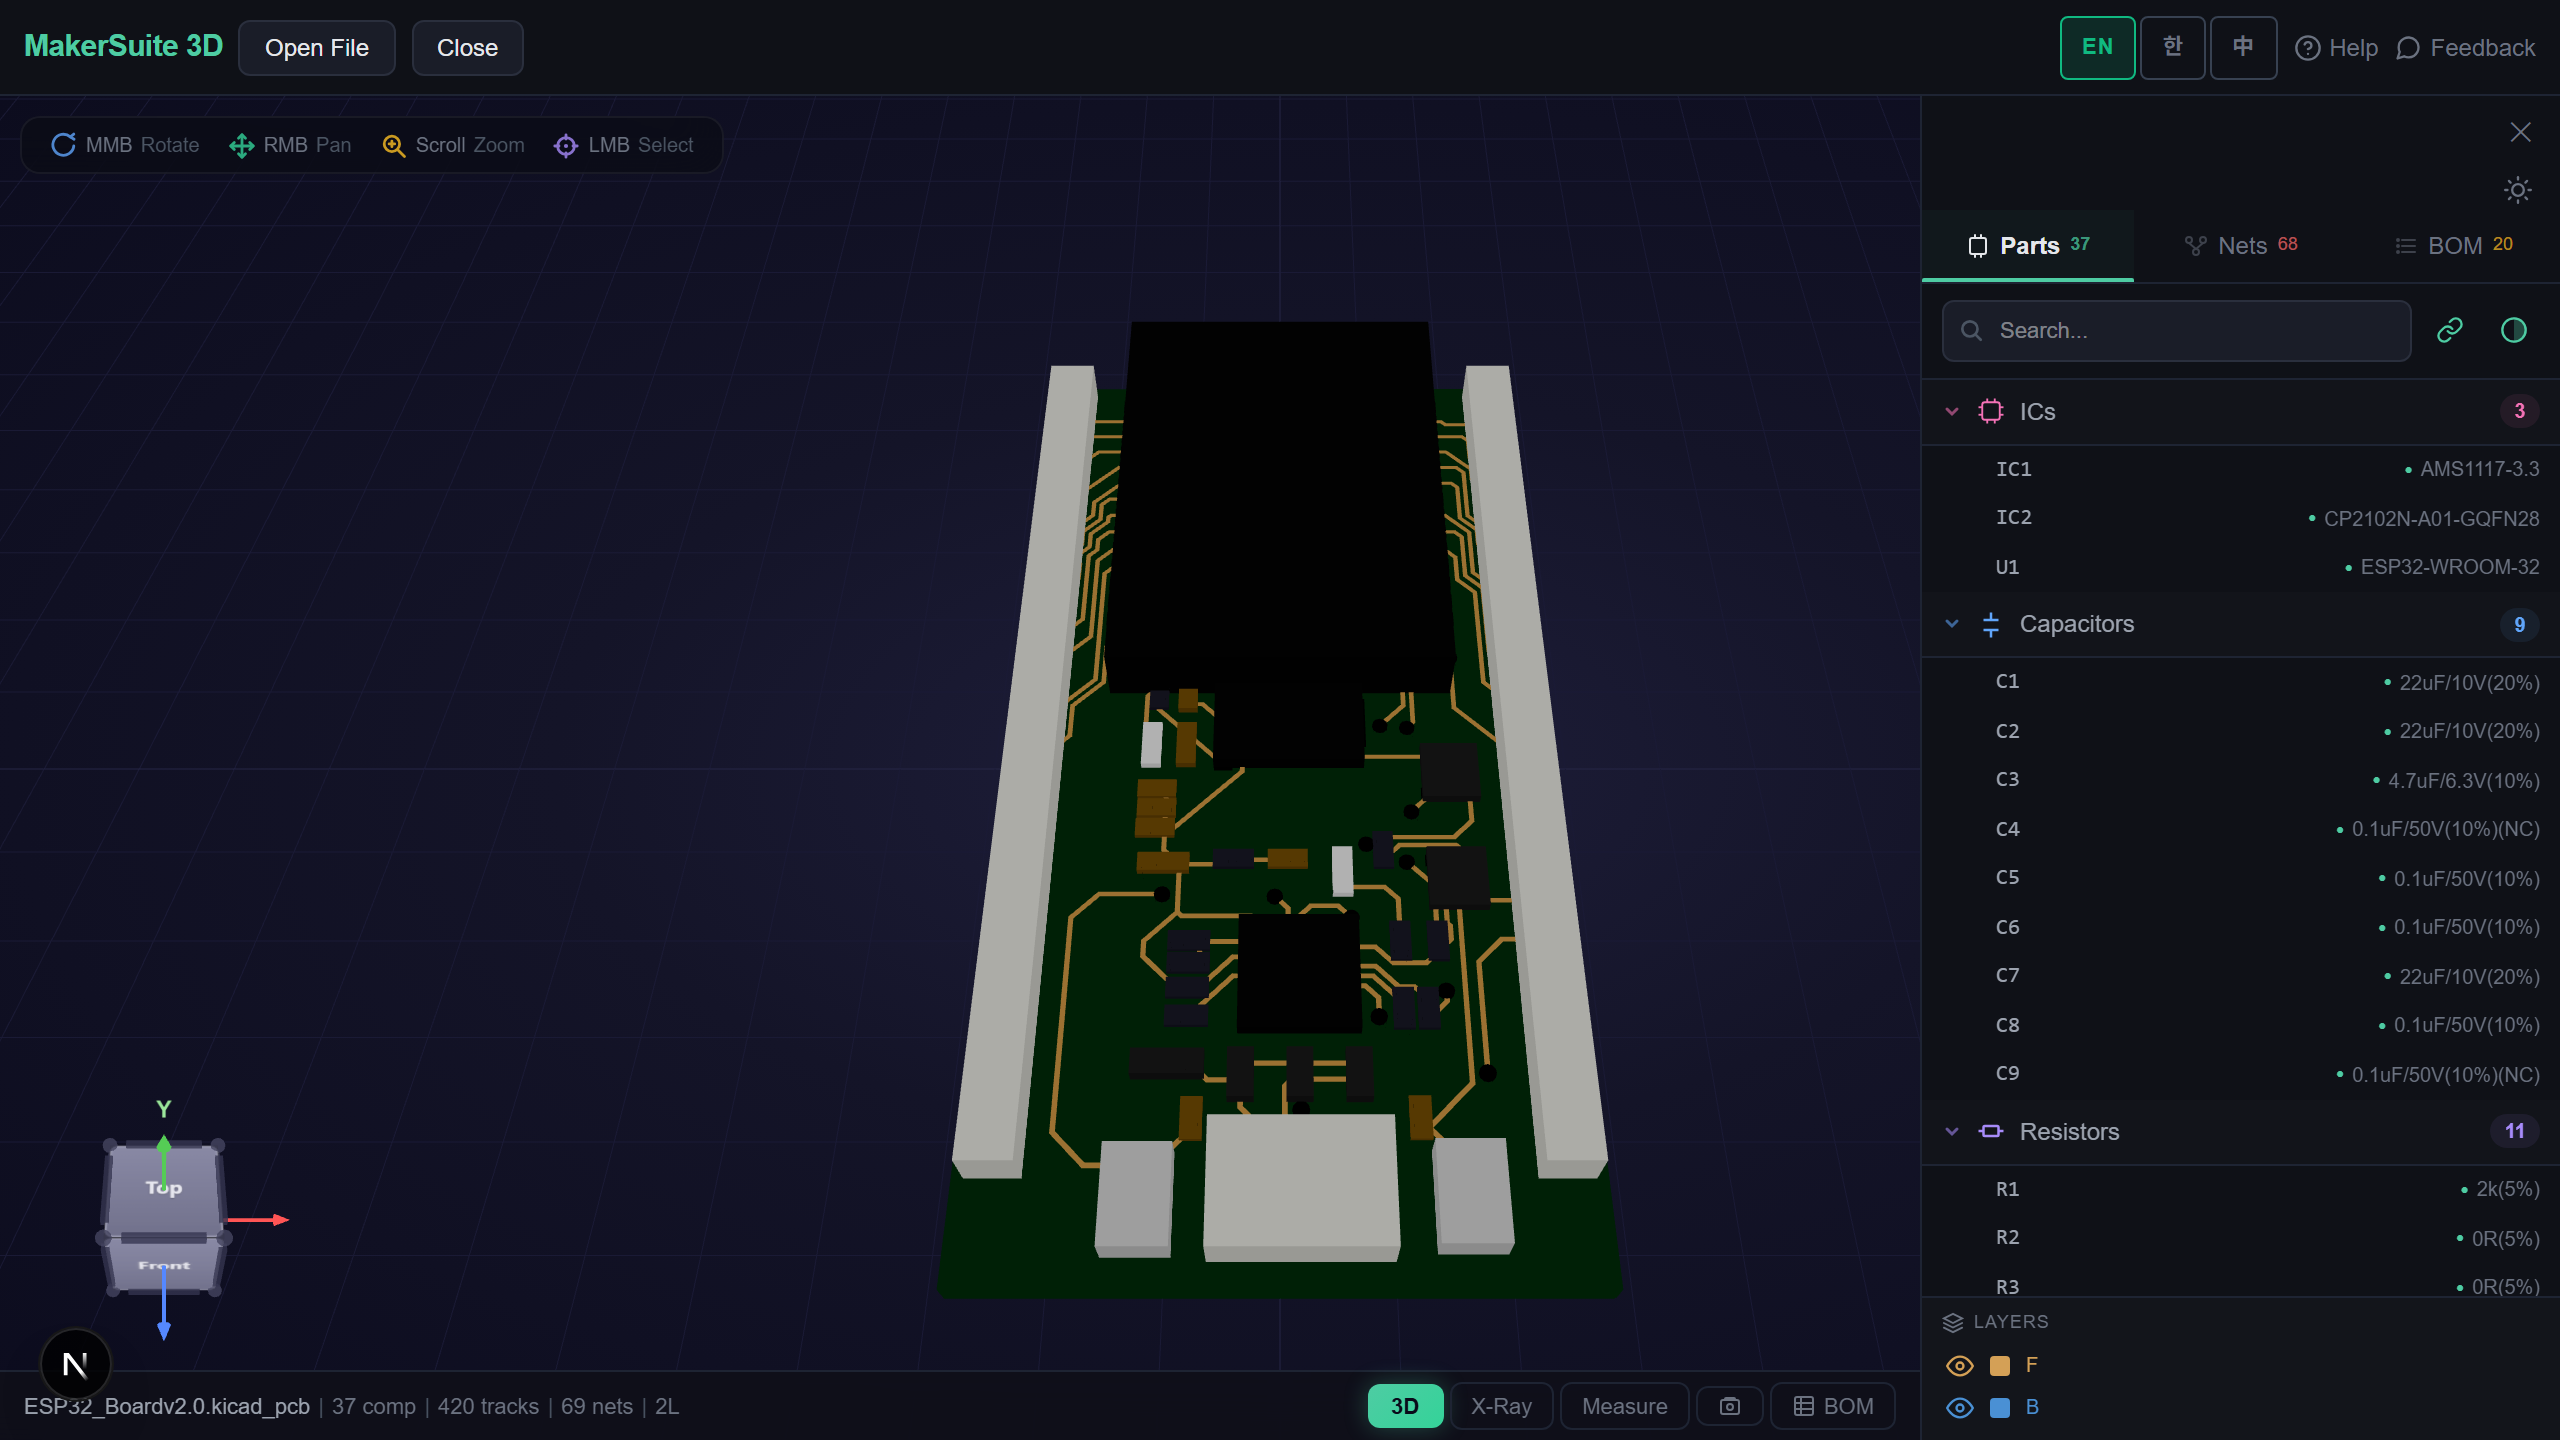
- Open pcbviewer.app and drop your PCB file. Components render in 3D with their orientation visible.
- Open the BOM panel. The Designator + Footprint columns help spot rotation errors before SMT submission.
- For each part, verify the 3D orientation matches the manufacturer's datasheet pin 1 marker.
- Cross-check against JLC's library footprint preview (jlcpcb.com/parts/<LCSC code>) for rotation offset.
- For first-time SMT orders, request a placement preview from the assembly house before fabrication starts.
Verify pick-and-place orientation in 3D — drop your PCB and check every component's rotation before SMT submission.
Try MakerSuite 3D FreeWhy PnP Errors Are Expensive
A wrong rotation in your CPL file means the SMT machine places parts at the wrong angle. The error isn't caught until visual inspection or first-power-on, by which point the entire panel is wasted. JLCPCB's setup fee for SMT is $8 per board type — repeat that across 5 prototype boards and a single bad CPL file costs $40 plus a week of lead time. Verifying orientation in a 3D viewer before submission prevents the most common assembly failure mode at zero additional cost.
When PnP Files Show Up
- JLCPCB SMT — required input for every assembled order, validated by their BOM tool
- PCBWay assembly — same role, slightly different column order convention
- In-house SMT — your factory's machine reads PnP for production runs
- Contract manufacturer quote — assembly houses use PnP to estimate placement time and quote
- Manual assembly — fabricators use PnP to print rework guides for hand-placed prototype boards
Browser-Side Parsing, No Upload
PCB files contain proprietary product designs. MakerSuite 3D parses files entirely in your browser; no server upload, no cached copy. Component positions, rotations, and reference designators stay on your machine. Safe for NDA reviews and pre-release product workflows where the assembly process discloses sensitive engineering choices.
Frequently Asked Questions
What's a pick-and-place file?
A pick-and-place (PnP) file — also called centroid file, position file, or .pos/.cpl/.csv depending on the tool — lists every SMT component's reference designator, X/Y center coordinate, rotation angle, and which side of the board it sits on (top or bottom). The SMT assembly machine reads this file to know where to place each part. Format is plain CSV or whitespace-delimited text. Standard columns: Designator, Footprint, Mid X, Mid Y, Rotation, Layer (or Side). Without it, the assembly house has to manually digitize component positions from the Gerber, which costs $50-200 in setup fees and adds a day to lead time.
How do I export pick-and-place from KiCad?
File > Fabrication Outputs > Component Placement (.pos). Select 'Use auxiliary axis as origin' if you defined one (recommended — sets a known reference point that fab can use for board fixturing). Choose CSV format; ASCII is for legacy machines only. Top and bottom layers export as separate files (project_name-top.pos, project_name-bottom.pos). For JLCPCB SMT, rename to project_name_cpl_top.csv to match their convention. Verify rotations using the 3D viewer before submitting — KiCad rotation conventions differ from many commercial CAD tools.
How do I export from Altium and Eagle?
Altium: File > Assembly Outputs > Generate Pick and Place Files. Choose CSV. Altium's default rotation matches the IPC-7351 convention. Eagle: Run the mountsmd.ulp script (Edit > Run > mountsmd.ulp) — this generates separate top.mnt and bottom.mnt files. Eagle uses ASCII format by default; convert to CSV via spreadsheet for JLCPCB submission. EasyEDA: File > Export > Pick and Place. EasyEDA exports JLCPCB-compatible format directly because it's the same parent company. For all tools, verify rotation conventions before first SMT order.
Why are rotations always wrong on first order?
Two reasons. First, EDA tools and component manufacturers disagree on the 'natural' rotation of each part — KiCad places SOIC-8 with pin 1 top-left, but the JLC library may have it pin 1 top-right. Second, JLCPCB and PCBWay rotate parts in their library at different angles than your EDA tool. The fix: download the part library's footprint preview from JLC's part page, compare to your KiCad/Altium footprint orientation, and add the offset to your CPL file before submitting. JLCPCB's rotation FAQ has a per-package offset table (typical: SOT-23 needs 180°, QFN sometimes 90°).
What if I'm using through-hole only?
You don't need a pick-and-place file. Through-hole assembly uses different equipment (wave solder or selective solder) that doesn't read a centroid file. The board outline, drill file, and silkscreen are sufficient for through-hole assembly. If your board mixes SMT (most parts) with a few through-hole parts (connectors, big electrolytics), generate the PnP for SMT only — the assembly house manually places the through-hole parts in a second operation. Mark through-hole parts as 'do not place' in your CPL or simply omit them from the file.
Related Articles
Verify pick-and-place orientation — drop your PCB file before SMT submission
Open MakerSuite 3D