PCB 叠层指南 — 选层、选材、选阻抗
叠层决定其他一切
叠层决定决定你的走线阻抗、布线密度、EMI 行为,以及很大一部分制造成本。它是你做的第一个真正不可逆的决定 — 其他所有选择(元件布局、走线路由、平面分割)都被它约束。本文覆盖标准 2/4/6/8 层叠层、何时用哪个、如何在 JLCPCB、PCBWay、OSH Park 指定阻抗控制叠层。
叠层里有什么
PCB 叠层指定铜层顺序、层间介质(FR4 或更高规格材料)、每层厚度、铜厚(0.5oz/1oz/2oz)、特殊特性(阻抗控制、盲/埋孔、镀金)。FR4 在 1 GHz 时 Dk≈4.5,是成本导向设计的标准。高速设计用 Megtron 6、Rogers 4350B 或类似低 Dk/低 Df 材料。总板厚通常 1.6mm(0.062"),0.8mm 与 2.0mm 也常见。
本指南覆盖
- 2 层叠层 — 何时用、铜厚选择、何时 2 层在高速信号下失败。
- 4 层标准 — Signal/GND/PWR/Signal、FR4 厚度、JLCPCB 默认、EMI 影响。
- 阻抗控制 — 50Ω 单端、90Ω/100Ω 差分、厂家规格工作流、价格。
- 6 层布线密度 — 4 层不够时、BGA 出线模式、内层信号布置。
- 8 层混合信号 — 模拟/数字分离的多个地平面、RF 集成、FPGA 出线。
- 逐层评审 — 在 MakerSuite 3D 打开解析的 PCB,逐层切换验证你的叠层意图。
如何验证你的叠层
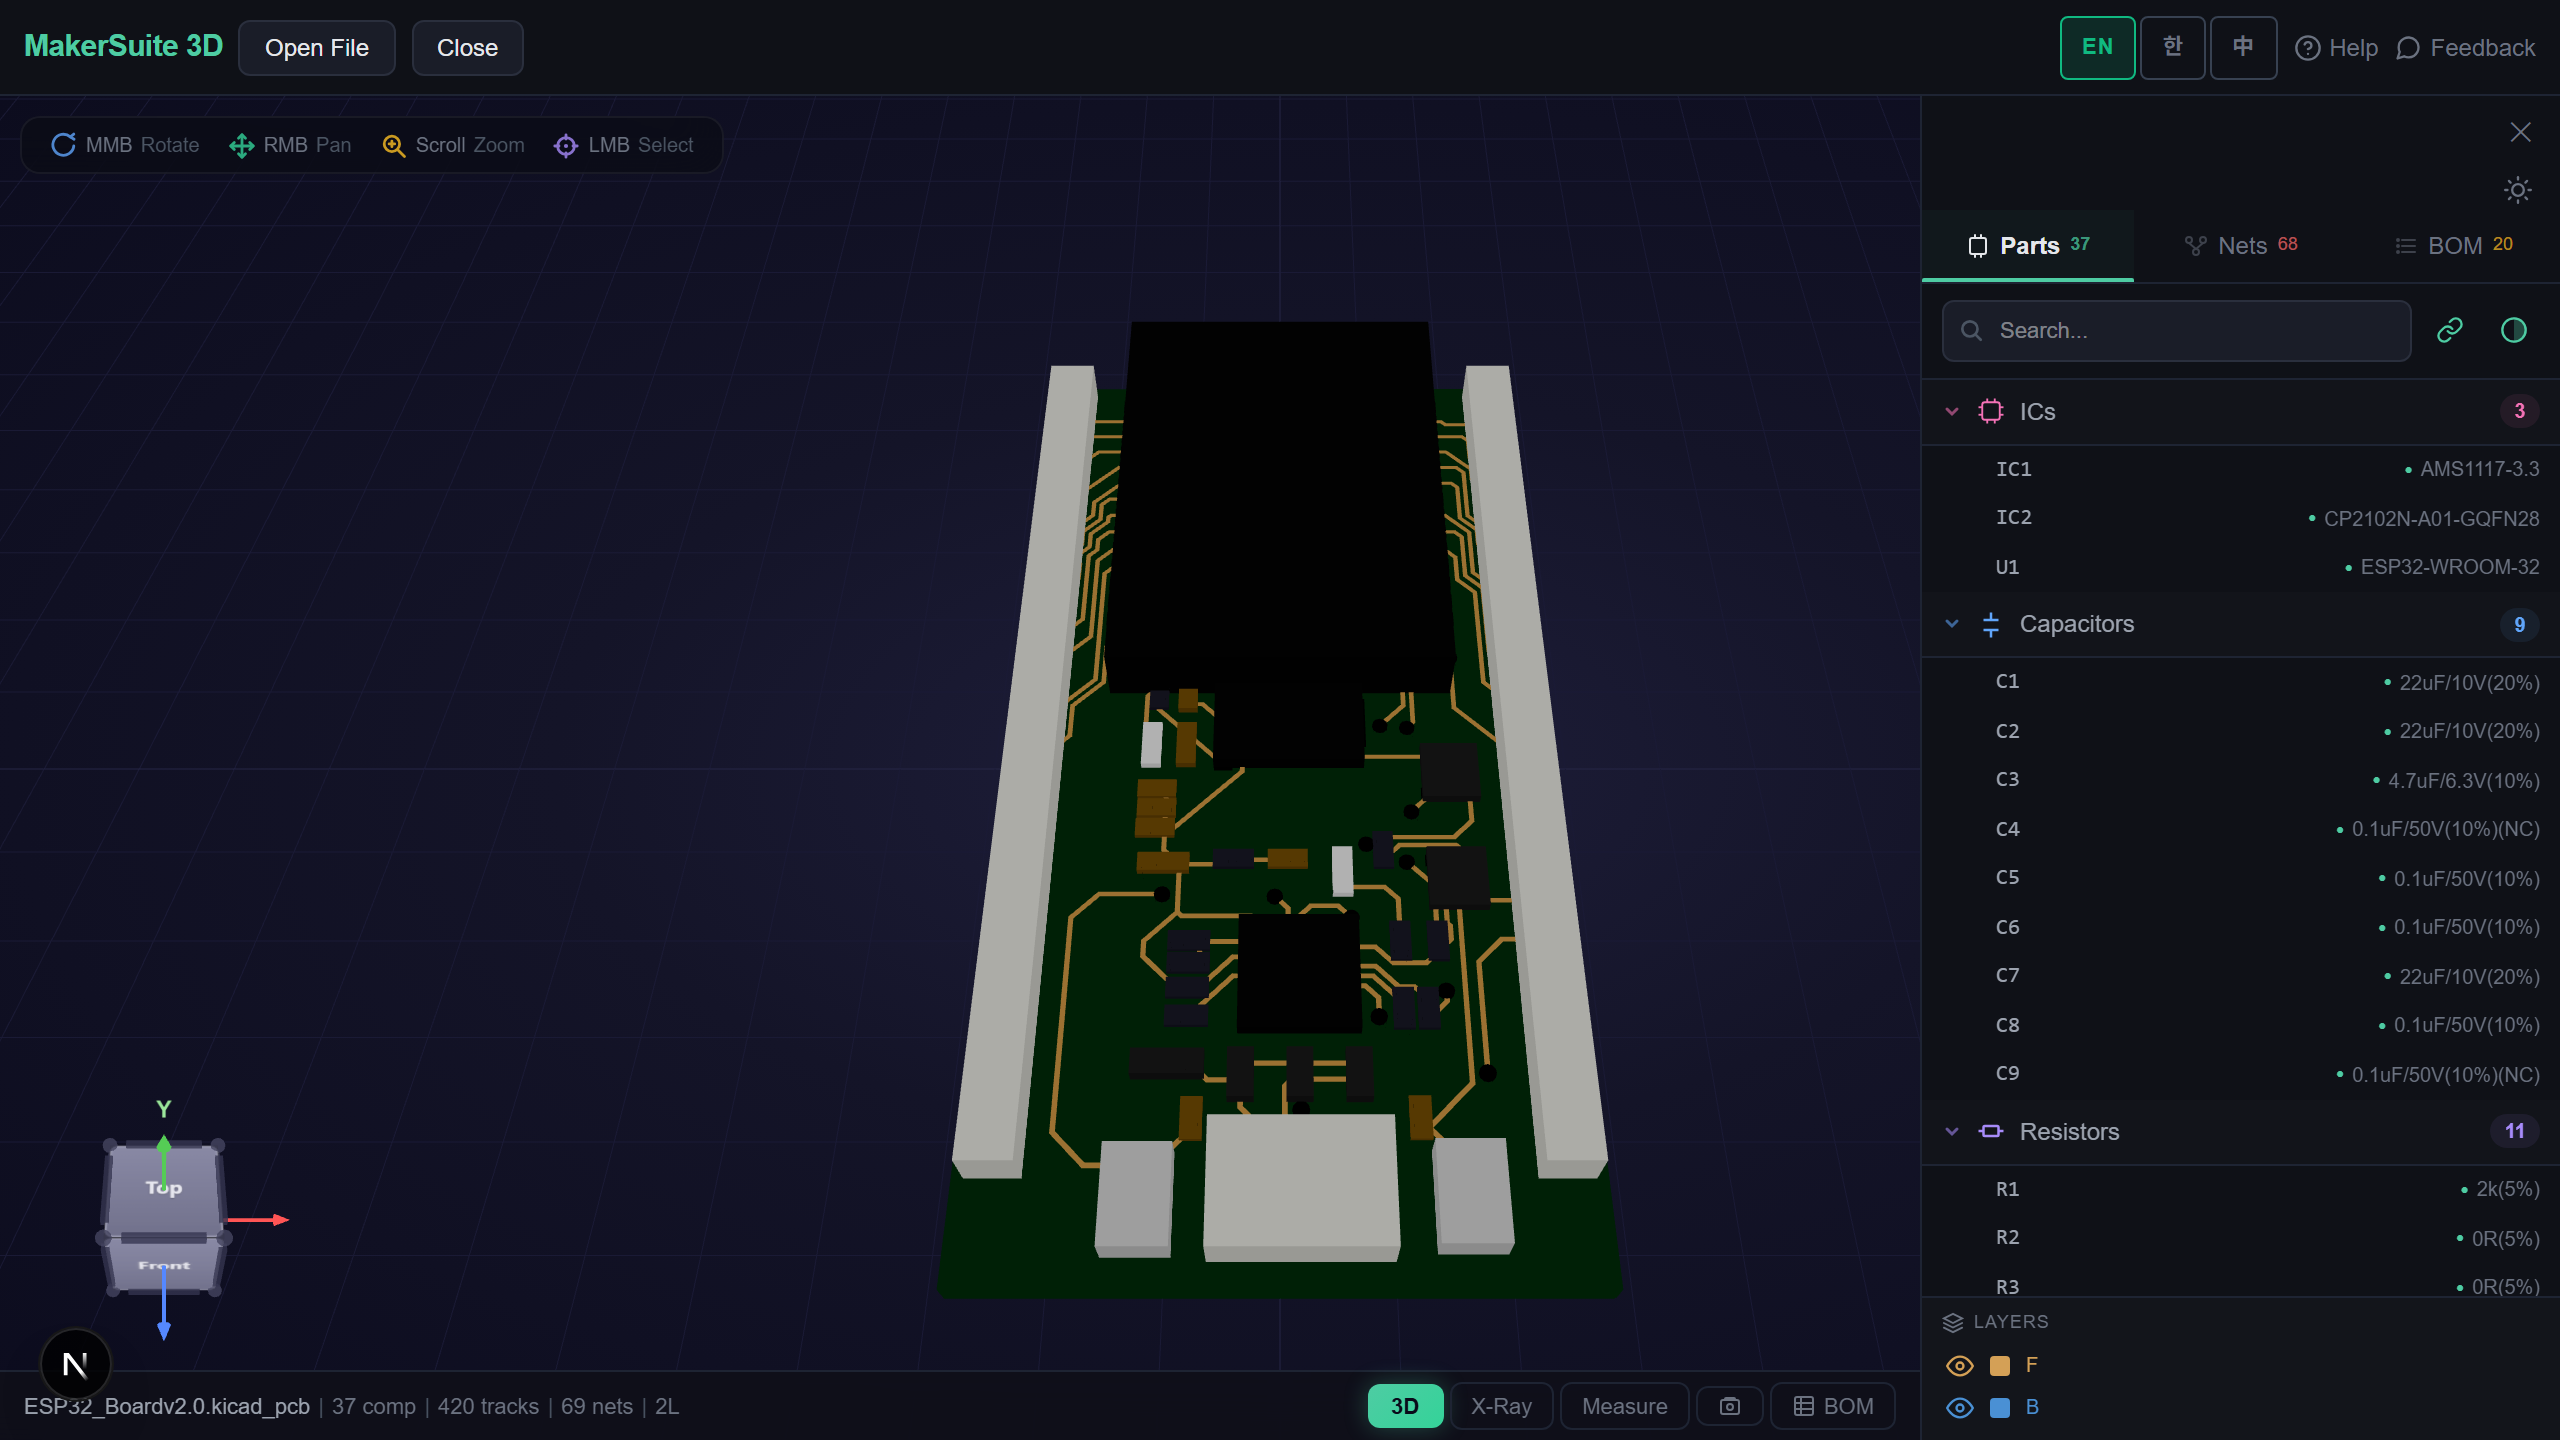
- Open pcbviewer.app 并拖入 KiCad、Altium、Eagle 或 Gerber 文件。解析器读取层分配与叠层元数据。
- 打开层面板。逐层(顶铜、GND、PWR、底铜)切换以验证叠层意图。
- 用截面视图看孔、镀通孔、层切换。验证没有信号穿过电源域分割。
- 对阻抗控制走线,查阻抗计算器(相关文章:PCB 阻抗计算器指南)。
- 将叠层规格导为 PDF 或包含在 JLCPCB、PCBWay、首选制造商的出板包里。
逐层可视化你的 PCB 叠层 — 拖入文件并切换每个铜、阻焊、丝印层。
免费试用 MakerSuite 3D为什么叠层选择定义你的板子
叠层决定级联。GND 在第 2 层的 4 层叠层让你不用担心回流路径就能在第 1 层路由任何高速信号。PWR 在第 2 层的 4 层叠层强迫你沿信号路由回流或接受阻抗不连续。在 JLCPCB 4 层成本差是 100×100mm 板 $2 vs $5 — 但设计努力差异巨大。新设计师默认 Signal/GND/PWR/Signal,只在有具体布线密度原因时才偏离。
每种叠层何时获胜
- 2 层 — 50 元件以下、无高速信号、成本敏感板(亚 $1 制造)
- 4 层 — 通用单片机板、USB 2.0、简单 I/O — 现代默认选择
- 6 层 — BGA 重的设计、200+ 元件、USB 3.x、DDR3、简单 FPGA 板
- 8 层 — 混合信号(RF + 数字)、大 FPGA(Xilinx Artix/Kintex)、DDR4/DDR5、汽车 ECU
- 10+ 层 — 高密度服务器、专业 RF、汽车雷达、100+ Gbps 网络 — 仅高端厂
浏览器端解析,零上传
叠层细节常透露敏感产品工程选择 — 阻抗控制规格、层分配、材料选择都是竞争情报。MakerSuite 3D 的叠层查看器在你的浏览器里完整解析文件;零服务器上传,零缓存。解析的叠层元数据留在你的机器上。NDA 评审、客户交接、对逐层披露敏感的板子都安全。
常见问题
Do I need 4 layers or can I do 2?
Use 2 layers if: total component count under ~50, no high-speed signals (USB, HDMI, DDR), and you have enough surface area to route everything without crossings. Use 4 layers if: you need a continuous ground reference for any signal trace (improves EMC and impedance), more than 50 components, or any signal above 50 MHz. The cost difference at JLCPCB is minor — a 4-layer 100×100mm board is ~$2 vs $5 in single-piece pricing — and the design effort drops significantly because you don't need to route returns alongside signals on a 2-layer board.
What's the standard 4-layer stackup?
Signal — Ground — Power — Signal. Top is signal+components, then a continuous ground plane, then power plane, then signals on bottom. Total thickness typically 1.6mm with each layer ~0.36mm prepreg between copper. JLCPCB's default stackup uses this arrangement with FR4 dielectric (Dk≈4.5 at 1 GHz). High-speed boards reverse the inner pair (Signal — Power — Ground — Signal) when the dominant nets reference the upper inner layer, but for general purpose, GND-as-second-layer is the convention because it's easier to route returns to the top signals through nearby vias.
Why does the inner layer matter for high-speed?
The return current of a signal flows on the nearest reference plane underneath. If the layer 2 reference is solid GND, your signal's return path is solid; if it's split (a power plane with cuts for different domains), the return current has to detour around the cut, which radiates EMI and creates impedance discontinuities. Rule: keep your high-speed signal layer adjacent to a continuous reference plane. For DDR3 and faster, this rule is non-negotiable.
What's a controlled-impedance stackup?
A stackup where you've calculated the trace width and dielectric thickness to produce specific impedances (typically 50Ω single-ended for USB/HDMI, 90Ω differential for USB 2.0, 100Ω differential for USB 3+ and Ethernet). The fab needs to know: target impedance, layer of the trace, copper weight (1oz typical for outer, 0.5oz typical for inner), dielectric Dk and thickness. JLCPCB and PCBWay both offer impedance-controlled stackups for $20-50 surcharge. Provide your stackup spec in the order notes; they'll tweak prepreg thickness to hit the impedance target.
How do 6-layer and 8-layer stackups differ?
6 layers: Signal — Ground — Signal — Signal — Power — Signal. The middle two layers absorb the routing density that 4 layers can't handle. 8 layers: Signal — Ground — Signal — Power — Ground — Signal — Ground — Signal, providing two separate ground planes (digital + analog or noisy + quiet). Use 6 layers for typical microcontroller boards with 200+ components and BGA escape routing. Use 8 layers for mixed-signal designs (RF + digital), large BGAs (FPGA, SoC), or high-speed differential pairs that need their own dedicated reference layers. Cost scales roughly 1.5x per added layer pair.
相关文章
可视化你的 PCB 叠层 — 拖入文件在浏览器里检视每一层
打开 MakerSuite 3D